Chapter 4 · The Printing and 3D Model Ecosystem
We have now looked at materials and filament. Next, we follow the process of printing an actual object to understand how material bonds, how settings contribute, where models come from, and which manufacturing tasks suit FDM.
4.1 Understanding Extrusion, Bonding, and Cooling
Three bonding relationships provide a useful starting point for understanding FDM. They help explain many common symptoms, but are not the sole cause of every problem.
First-layer adhesion to the build plate: Can the print stay firmly attached to the plate without coming loose?
Bonding between layers: Can each printed layer of plastic bond securely to the layer beneath it to form a strong whole?
Bonding between adjacent lines within a layer: Can the extruded strands join well enough to form a dense structure?
Material must first extrude consistently, then bond to the plate or existing structure and cool into shape at the right time. Understanding these processes is more useful for beginners than memorizing a set of settings.
An unstable first layer can let the model detach; insufficient interlayer bonding can let a part crack along a layer; and freshly extruded lines that set too slowly can sag on overhangs. Feed resistance, hotend clogs, or path problems can also change the result.
This section builds understanding rather than listing every remedy. For stringing, clogs, warping, spaghetti failure, or color differences, go directly to the relevant chapter in PART 2.
4.2 Understanding Common Print Settings Through Slicing
From a Digital Model to a Physical Object: Slicing Is a Key Step
A digital model must be sliced into paths and extrusion instructions that the printer can execute. Slicing divides the three-dimensional shape into many thin layers and plans how material is deposited in each one.
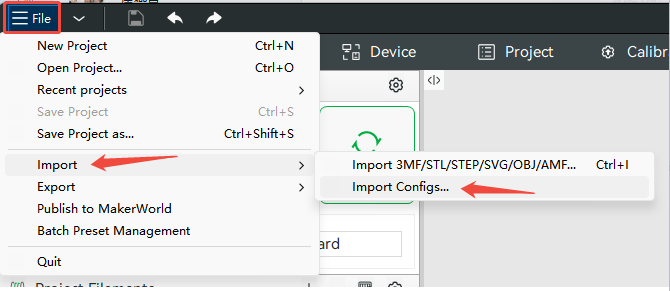
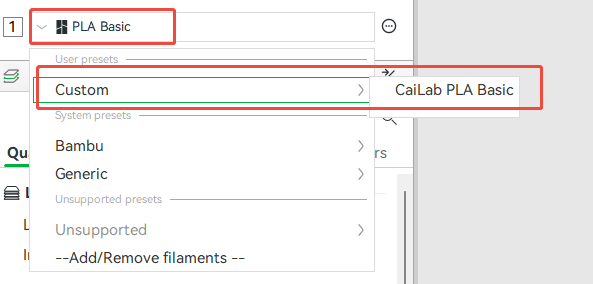
Slicing software also arranges supports, infill, speeds, and color changes. When importing a project from someone else, still check your own printer, nozzle, build plate, and material configuration.
Common Slicing Software
Slicing software is the command center of 3D printing. Common options include:
Cura: A widely used slicer that supports many types of equipment; actual compatibility depends on the current configuration.
Bambu Studio and PrusaSlicer: Each provides workflows within its respective equipment ecosystem. When choosing software, first check printer profiles and the features you need. Do not directly copy settings from other machines.
Equipment manufacturers’ software, such as Creality Print, can also provide a slicing workflow for compatible machines.
Interfaces and features change, so the focus here is on understanding the workflow. Refer to the equipment and software guides for the current version when operating them.
Core Print Settings to Understand
Understanding these basic settings provides a foundation for understanding and resolving print problems.
Layer Height
What is it? The thickness of each deposited layer of plastic.
What does it affect? Layer height affects stair-stepping on curved surfaces, detail, and print time. Smaller layers do not resolve detail limitations in every direction; the nozzle, line width, and model also matter.
Wall Thickness
What is it? The thickness of the model’s outer shell.
What does it affect? The shell contributes to a part’s structural behavior. Wall count, line width, material, orientation, and loading must be considered together; a wall-thickness value alone is not enough.
Infill Density
What is it? How densely the internal structure of the model is filled.
What does it affect? Infill affects internal support, material use, time, and structural behavior. Continually raising infill is not necessarily the answer for a load-bearing part; the shell and print orientation are equally important.
Print Temperature
What is it? The temperature at which the nozzle heats the filament.
What does it affect? This is one of the most important settings, directly affecting interlayer bonding and smooth extrusion. An unsuitable temperature can cause problems such as under-extrusion or stringing.
Bed Temperature
What is it? The temperature to which the build plate is heated.
What does it affect? It affects the thermal conditions of the first layer and the base, but must suit the plate surface, material, calibration, and environment. Temperatures that are too low or too high can both cause problems.
Print Speed
What is it? How quickly the print head moves.
What does it affect? Time, appearance, and extrusion demand. Distinguish speeds for outer walls, inner walls, bridges, and other features. Speed changes within the same model may also cause gloss changes.
Cooling Fan Speed
What is it? The intensity of fan cooling applied to the extruded plastic.
What does it affect? It mainly affects unsupported features. Insufficient cooling can let overhangs sag; excessive cooling can impair interlayer bonding.
Retraction
What is it? Slightly pulling filament back during non-printing travel moves.
What does it affect? Retraction helps control travel oozing, but settings depend on the feed system. Too much can cause feeding problems; more is not always better.
From Settings to Your Goal
3D printing offers plenty of hands-on experimentation and DIY enjoyment. Although modern desktop printers have made operation much simpler, adjusting slicer settings for different models and goals remains essential.
This is both part of learning 3D printing and part of its appeal: no single set of settings works for every situation. Successful printing depends on patient understanding and careful adjustment.
Every material also has physical limits. A failure can have several causes, including machine condition, settings, model design, and environment; the model’s structure may also exceed the material’s physical capabilities.
When a result falls short, describe the symptom first, then investigate the model, material, and equipment. PART 2 provides troubleshooting steps for specific problems and can be used without repeatedly reading this part.
It is also important to understand volumetric flow rate: the volume of material that must be extruded per unit time. Line width, layer height, and print speed together determine flow demand. “Millimeters per second” alone cannot establish whether the hotend and material can handle a job consistently.
4.3 Finding Models and Creating Your Own
After understanding settings, consider where digital models come from. Common routes include model platforms, AI-assisted generation, and original design. The choice depends on whether you want to reuse an existing design, explore shapes, or control geometry precisely.
Model Platforms
Model platforms make files more accessible, but read the creator’s instructions, printing conditions, and license before downloading. Being able to download a file does not automatically permit redistribution or sale of printed objects.
| Platform | How to Use This Starting Point |
|---|---|
| MakerWorld and Creality Cloud | Read the platform’s model and print-project instructions. |
| Printables and Thingiverse | Search models, make reports, and creator instructions. |
| Cults and Thangs | Explore model discovery, designers’ content, and file-use conditions. |
AI-assisted Generation
AI tools can help explore three-dimensional forms from text or images, but the results still need printability checks, particularly for thin walls, floating geometry, meshes, supports, and assembly relationships.
Tools such as Tripo and Hunyuan 3D can be starting points for exploration. Their actual capabilities and terms depend on the current service.
A model with colored textures on screen does not necessarily have the separate parts or color assignments needed for multicolor printing. Check the output further in modeling and slicing software.
Original Design: Common 3D Modeling Software
Designing your own models gives you more direct control over dimensions, structure, and appearance. Choose software for the task: artistic forms, parametric mechanical parts, and complex surfaces often require different workflows.
For Figurines, Characters, and Other Artistic Work
Blender: A comprehensive, free 3D creation suite combining modeling, sculpting, rendering, animation, and more. Its large user community makes it well suited to artistic design and animation production.
ZBrush: Professional digital sculpting software known for powerful brushes and fine detail, and a common choice among professional artists creating detailed characters and creatures.
For Functional Parts and Precise Structures
Creo (Pro/ENGINEER) and SolidWorks: Widely used parametric CAD (computer-aided design) tools in engineering. They emphasize precision, editability, and assembly relationships, and are widely used in mechanical design, part manufacturing, and engineering analysis.
Fusion 360 and Rhinoceros: These tools offer a useful balance of usability and capability.
Parametric tools can manage dimensions, assemblies, and design history. Suitability for a particular task should be assessed against project requirements.
Rhinoceros: Known for free-form NURBS surface modeling, it is widely used in industrial, jewelry, and architectural design, and is particularly useful for complex curved forms.
Whatever the source of a model, check dimensions, wall thicknesses, clearances, supports, and conditions of use. Keep records of the creator, source, version, and license. Check the applicable conditions separately before displaying a model, redistributing it, or selling prints.
4.4 How FDM, Resin Printing, and Injection Molding Relate
With materials, slicing, and models in mind, place FDM within manufacturing as a whole: it can work alongside resin printing and injection molding or manufacture final products independently. Compare geometry, quantity, appearance, and overall cost when choosing a process.
The following table explains differences; it is not a fixed performance ranking for every material, machine, or task.
| Comparison | FDM | Resin Printing | Injection Molding |
|---|---|---|---|
| Forming principle | Molten filament deposited layer by layer | Light cures resin | Molten plastic is shaped inside a mold |
| Process category | Additive manufacturing | Additive manufacturing | Molding |
| Common considerations | Layer lines, orientation, supports, and printing conditions | Detail, washing, curing, and material conditions | Molds, demolding, production volume, and design changes |
| Uses | Prototypes or final products | Prototypes or final products | Commonly used for volume production of settled designs |
The Core Conclusion: A Complementary, Evolving Manufacturing Ecosystem
The three processes can be combined according to geometry, production quantity, and development stage. Common approaches include rapid validation followed by volume production, and direct delivery of printed final products.
Manufacturing in Stages: A Linear Path from Idea to Product
This approach suits products with relatively conventional geometry that can be molded and ultimately need large-scale production. The three processes take different roles during the product life cycle, forming an efficient sequence.
Concept and Prototype Stage: Use FDM to test structure and resin printing to validate appearance through fast, low-cost iteration. The main value is checking the design and reducing the risk of a costly later investment in molds.
Volume Production Stage: Once the design is settled, move to injection molding for efficient, low-cost production at scale.
Direct Manufacturing: Printing as the Delivery Process
For complex geometry, ongoing customization, or many variants in small quantities, printing may remain the final manufacturing process rather than simply an intermediate step toward injection molding.
For example, integrated moving structures, particular internal geometries, or customized tools may make mold production difficult or uneconomical. Actual suitability still needs validation with the equipment and material.
For small runs of creative products or dedicated fixtures, it is often useful to consider the flexibility of printing. Assessing the most economical option requires accounting for labor, post-processing, yield, and quantity together.
Connecting the Whole Chain
Raw material properties influence filament formulation; filament and equipment together define the processing window; models and settings determine how material becomes the final structure.
If you are a beginner, choose a simple model next, use a matching material profile, and observe the first layer, appearance, and completion of the print.
If you already have a problem, go directly to PART 2. Each chapter develops one symptom into a complete troubleshooting process, from causes to verification.
When you want to develop the visual effect further, turn to the color and material appearance topics in PART 3.